Detaching your Awning from the Van or Motorhome - A step by step guide.
(Using a Fixing Kit)
A step by step guide on how to detach your drive away awning from your camper van or motorhome, and drive off from the campsite, leaving just the awning, free-standing. To confirm, this method uses a fixing kit, which are readily available, and the easier solution to attaching and detaching an awning from the van. To learn more about different types of attachments to vans, please see this article, about attaching your awning to your van.
What is a Drive Away Awning?
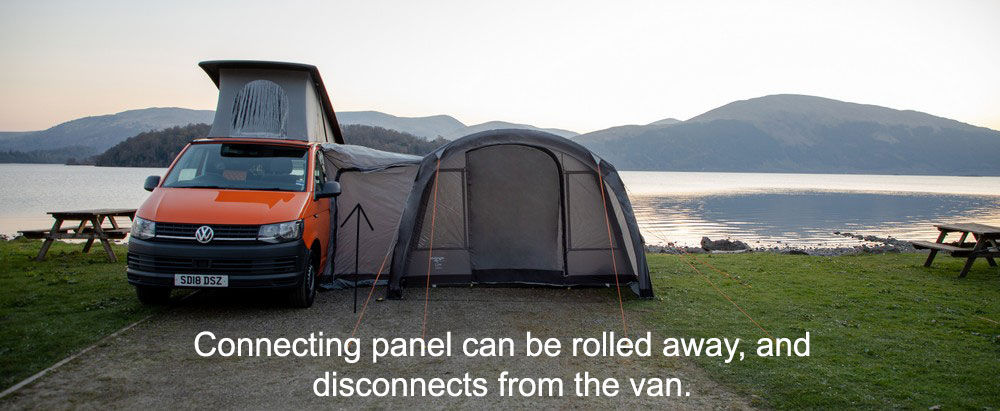
As this image above shows, a drive away awning has two sections, the main living space, and then the connecting panel / cowl, which can be folded away after it is disconnected from the vehicle. As per the image below:
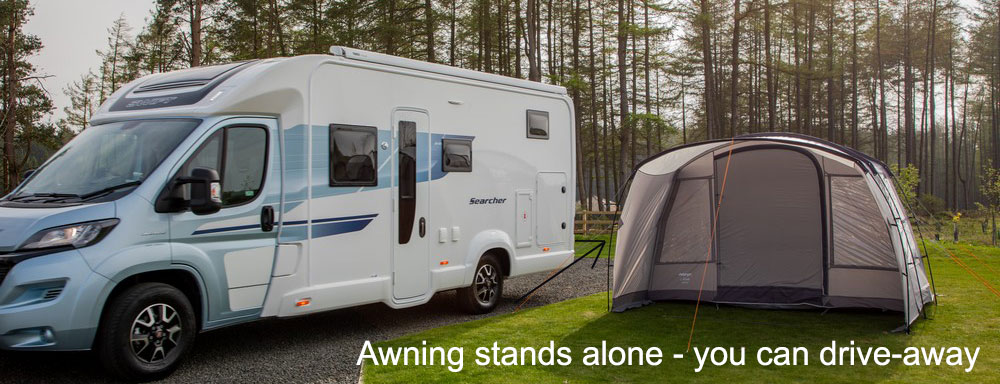
Imagination Required
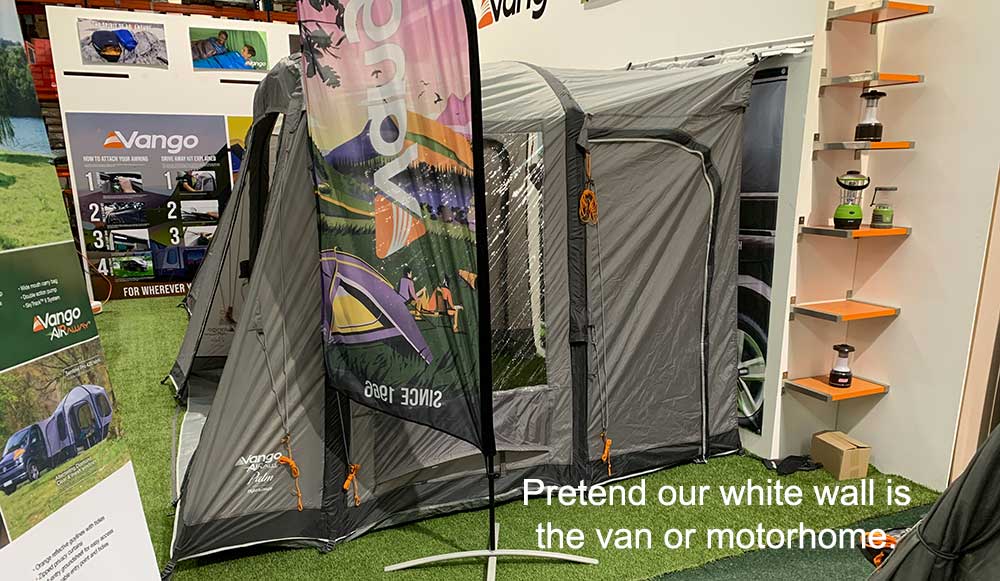
Some imagination is required here folks! So here's the Vango Palm Awning, displayed in store, with the use of a fixing kit. As you can see, the awning is well pitched and securely attached to the wall, which is our pretend camper van or motorhome.
Understanding how the fixing kit connects.
So the image below shows the fixing kit, which acts as a "middle man" between your awning rail, and the awning itself. In this instance, the kit attached to the wall is acting as your awning channel, or your Fiamma F45, or Reimo Rail, whichever system you have attached the to the side of the van. The purpose of the fixing kit is to allow you to quickly detach / re-attach the awning to the side of the van in two simple steps.

Figure of 8 Strips
The figure of 8 strips, which come with the drive away fixing kits, allow you to slide the pre-attached Kador rail on your awning (all awnings have a 4mm / 6mm pre attached kador rail) into the fixing kit. You then use the channel provided with the fixing kit, to connect into your van rail groove.
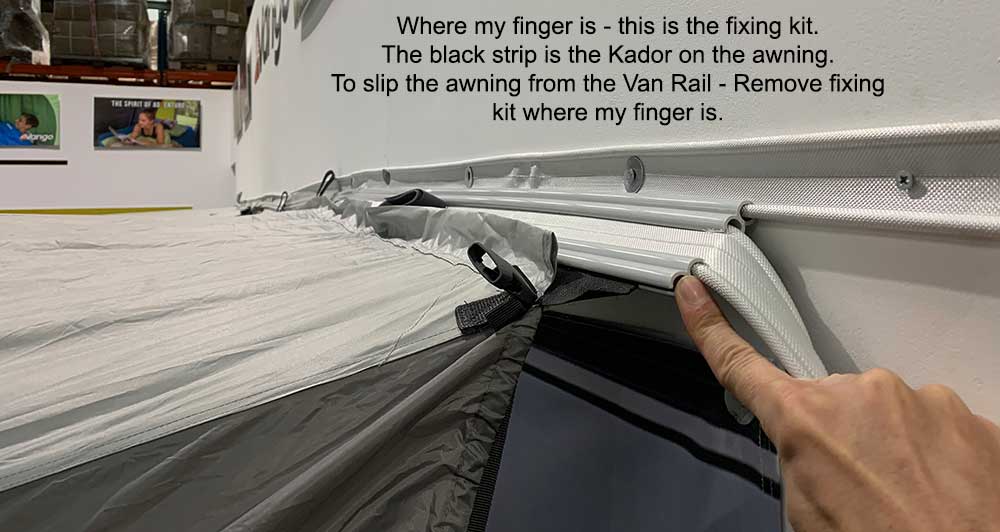
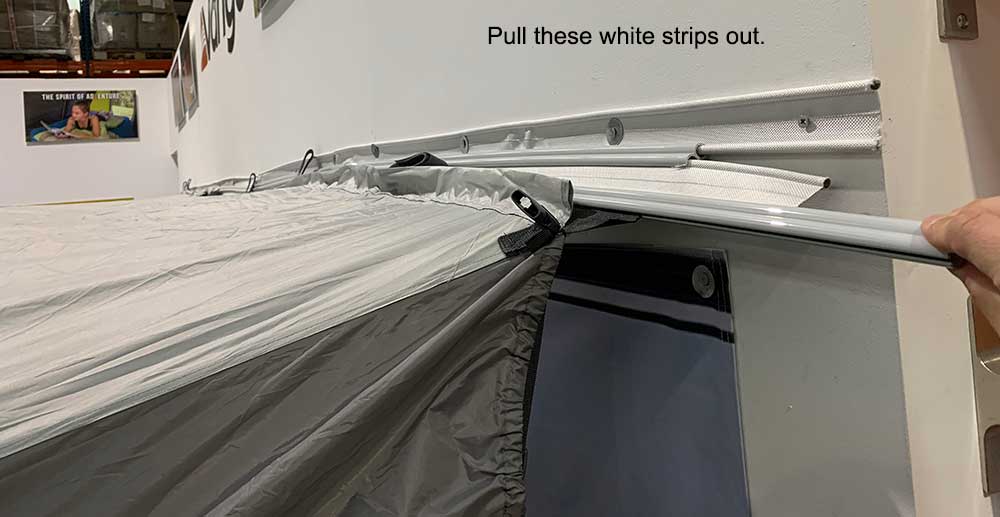
Step 1- Detaching the Awning - Pull the White Strips Out
When you are ready to leave the site, you simply remove the three or four plastic fixing strips - "removing your middle man connection". Once you do this, the connecting panel of the awning, will fall away from your van / or motorhome. If you have a motorhome, you will need to wind out your rail, to a height where you can pull the strips out.
Step 2 - Connecting Panel Falls away from your Camper Van or Motorhome
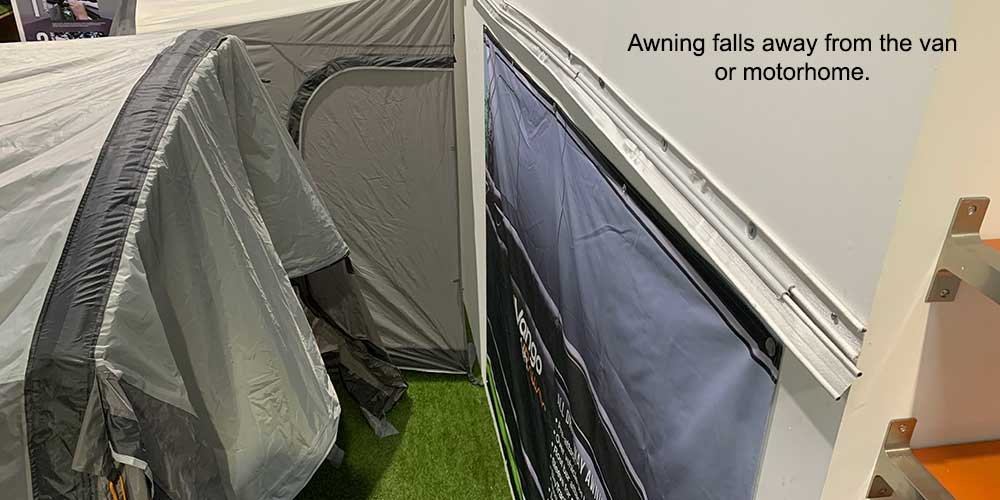
Once the three or four plastic strips have been removed, you will notice the awning, which is free-standing, will drop away from the van or motorhome, severing the connection between the two units. At this point in time, it is a good idea to mark out where your types are using chalk, or a peg into the ground. This will make it simple to realign your van with the awning when you return to the campsite.
Step 6 - Tidy away the Connecting Panel
To avoid accidental damage to the awning, it is a good ideal to roll back the connecting panel of the awning, which will fold nicely against your free-standing awning, creating a neat and tidy finish to your camper van awning. Then you can simply drive off-site - remember to mark where your tyres are, for when you return to the campsite.

Fixing Kit Contains
- 3 or 4 (Depending on size) * 1m Plastic Figure of 8 Strips
- 1 Long Channel to fit between the van and the awning.
Types of Fixing Kit
- 3 Metre - 4mm / 6mm Fixing Kit - used with Fiamma Awnings
- 3 Metre - 6mm / 6mm Fixing Kit - used with all other types of Rails
- 4 Metre - 4mm / 6mm Fixing Kit - used with Fiamma Awnings
- 4 Metre - 6mm / 6mm Fixing Kit - used with all other types of Rails
